Today we’re talking nuts and bolts. The essential tools and tricks that I’ve found make a certain kitchen task easier, or that ensure the desired results, every time.
We spent last weekend in Washington, D.C. with family. It was a whole lotta fun, both sight-seeing in our nation’s capital and getting to know family that neither I or Baby Cousin Alycia had ever seen much of.
On Friday night, we went to eat at Nando’s, which just happens to be James’s favorite restaurant in the entire universe. While this Portuguese meets African grilled chicken chain is on nearly every street corner in London, here in the U.S., they only have locations in Washington, D.C. and Maryland.
Dear Nando’s: New Jersey needs you. Specifically, Scotch Plains, New Jersey needs you. But we’ll take anything in a 30 minute driving radius. Please and thank you.
But this post isn’t really about chicken, or even Washington, D.C., really. Other than to say that when I mentioned to my aunt that I bake our weekly bread, the look on her face was priceless.
I assure you, folks: I’m not some crazy everything-must-be-homemade food Nazi. I’m the first one to order a pizza instead of making it (for me, pizza is about convenience on a random Monday night, not much else) or suggest going out for a meal. While I can and do often make my own pizza dough, I still find value in letting others do it for me too.
But when it comes to our weekly bread, I feel like I’ve finally cracked every nuance of making the perfect sandwich bread. I know exactly what goes into it, there are no preservatives, and as long as we keep it in the refrigerator, it lasts as long as store-bought bread.
Not to mention the taste. THE TASTE. Freshly made bread, be it white, whole wheat, or white whole wheat, is entirely different to that of bread made several states away in a factory. At roughly 23 cents a loaf, I kinda think it’s worth my time. And yours too.
The essentials of bread baking in my kitchen are as follows:
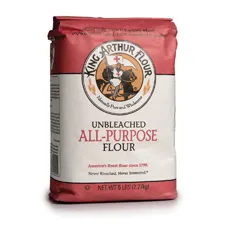 | Good Quality Flour |
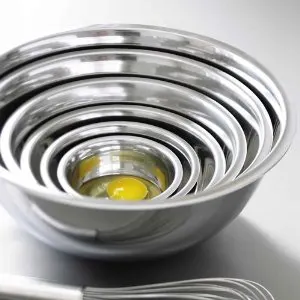 | A large bowl, preferably metal or ceramic |
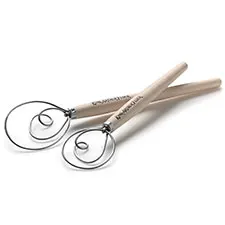 | A Dough Whisk |
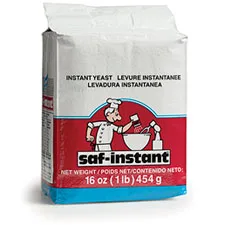 | Good Yeast |
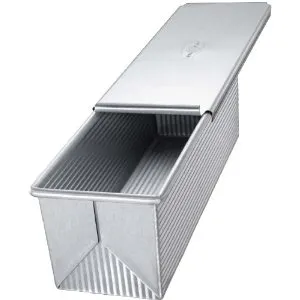 | A Pullman Loaf Pan |
Flour is important.
No matter what you’re baking, if you want consistency in your results, you need to choose a flour that has a consistent protein content. The only company I know of that guarantees that protein content is King Arthur Flour.
Knowing that you’re going to get the same results every time you bake bread is priceless. King Arthur Flour is available in most stores, on their website, and even at Wal-Mart, where it is often times cheaper than more well known brands, at least in my experience. For guaranteed results, it’s worth searching them out.
Yeast – yummy little friends!
Yeast is indeed, a living thing. Yeast is what gives bread its rise, and its flavor. You don’t have to buy big sacks of it like in the photo, or even from King Arthur Flour (where I get mine). But I thought I would show you what I use. I keep it in a ziptop bag in my refrigerator, and it’s super easy to measure and see how much I have at a glance.
However, KAF says:
“WHY WE LOVE IT: SAF is easy to use (no proofing or pre-dissolving); it’s fast-acting and long-lasting, continuing to work for hours longer than “rapid” yeast. It’s absolutely reliable. AND it costs 75% LESS than supermarket active dry yeast. ‘Nuff said.
Never add water to yeast that’s above about 120F. 120F will start to kill it, resulting in an unhappy rise. At 140F it dies instantly, which means your baked good won’t rise at all. Keep in mind that boiling water has a temperature of 212F. That means the water you use in a baked good might need to be a lot cooler than you previously thought.
Having the right tools is key.
Starting out with the tools that make your task easy is, for me, half the battle. You’ll notice that a breadmaker is not in my list of essential tools. I used to think bread was way too hard, and I’d never make yeast bread without one.
Now, I’d never give up the process of kneading my own dough to a breadmaker! That’s like letting someone else use your spa gift certificate. Kneading bread dough is one of the most zen, relaxing experiences I can think of. Plus, I find that I get a much better crumb and tight loaf than a breadmaker can ever accomplish, with the right tools.
I mix my dough and let it rise in the same bowl. After I’ve turned out the dough, but before I’ve started to knead it, I re-wash my favorite metal bowl, and spray it with cooking spray. Then I’m ready to return the dough to its favorite spot once it’s silky smooth and ready to rise.
The first time I used a dough whisk was at King Arthur Flour’s Baking Education Center. Heck, the first time I’d SEEN one was there. I believe most of us in the class were befuddled at first by this curly-cue utensil. Susan, our instructor at that moment, said, “Just try it. You’ll get it.”
She was absolutely right. Dough whisks mix yeast dough perfectly without much sticking. You’re less likely to overmix because the dough whisk works through the flour and liquid so well, combining them easily. And it’s nice not to cover my hands in sticky dough right at the start of my baking session.
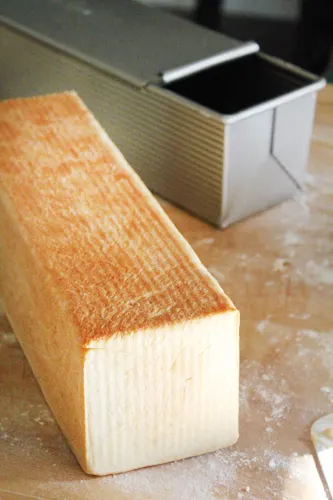
Want square bread slices? Bake it in a square bread pan!
This tip might seem a little obvious. But until I clocked the Pullman or Pain de Mie pan on King Arthur Flour’s blog, as much as I love baking our sandwich bread, I didn’t always love the uneven slices that resulted from the rounded top loaves I baked.
When I saw that square shaped pan that includes a lid to keep the top of the bread perfectly square and even too, a lightbulb went on. Make sure that you purchase a Pullman Loaf Pan with a lid, and you’ll get a perfectly square, perfectly browned on all sides loaf of bread.
Baking bread is super easy. I promise.
Basic Bread
I love this recipe so much, I keep it taped up inside the door of one of my kitchen cabinets so that I never lose it.
Originally this recipe made two loaves in 9″ bread pans. When I purchased my Pullman pan, I went for a 13″ pan without realizing. It turned out to be a blessing in disguise.
Using the same recipe, I get one large, tight-crumbed loaf of bread that makes roughly 22 perfectly sized sandwich bread slices. I highly recommend the 13″ pan, but you can also purchase a 9″ Pullman loaf pan and bake two loaves.
I would suggest freezing the second immediately after it cools for later use. Freezing it after it’s been sliced will make it even easier to use straight from the freezer.
Ingredients
5 to 6 cups King Arthur Unbleached All Purpose Flour (or a mixture of flours. I sometimes do 3 cups of AP and 2 cups of white whole wheat flour)
1/4 cup Baker’s Special Dry Milk (or dry milk from the grocery store)
1 tablespoon granulated sugar
2 1/4 teaspoons yeast
2 teaspoons salt
2 tablespoons unsalted butter at room temperature
2 cups warm water (roughly 90-100F)
Directions
Measure 3 level cups of flour into a large metal bowl. Add the milk powder, sugar, yeast and salt. As you dump each item into the bowl, do it in a clockwise location around one edge. That way you can see the individual ingredients and don’t have to question what you’ve added if you lose your place in the recipe or have to walk away for some reason.
Whisk to combine and aerate, using a dough or regular whisk. Mix in the butter gently.
Pour in the warm water and mix well using a dough whisk or rubber spatula.
Stir in 2 more cups of flour and combine. Your dough should resemble a shaggy mass – not too sticky, but not dry either. There should be no spare flour hanging out at the bottom of the bowl, so continue stirring to incorporate that.
You might ask what a shaggy mass looks like – and well, those two words describe it perfectly. It’s not round and soft and supple yet, but it still looks like dough. Kinda like when you first wake up in the morning and your hair sticks out all over the place before you brush it? Similar concept.
If your dough seems too wet, measure out that last (6th) cup of flour, and add a little at a time and mix until you feel the dough has come together. The dough should not be dry.
The reason that the recipe calls for 5-6 cups of flour depends on the humidity where you are. More moisture in the air means the recipe needs more dry ingredients to come together. In Winter, or in an air conditioned Summer kitchen, 5 cups is usually sufficient for this recipe, and I use the 6th on my kneading board.
Lightly flour a surface for kneading. Turn out the dough onto the surface. Start by folding the dough in half, towards you. Then, using the heel of your hands, push the dough out away from you. Turn the dough by one quarter turn clockwise and repeat.
Repeat this process for about 8-10 minutes. If the dough starts to stick to your hands or the board, sprinkle it and the board lightly with flour. As you knead, you should notice the bread start to become more elastic and soft. After the 10 minutes, you should be able to form the dough into a soft round ball easily, and it should offer a fairly smooth surface to the touch.
Spray a clean bowl with cooking spray and place the ball of dough in it. Cover with plastic wrap, pushing the plastic down around the dough ball like you’re tucking it in for the night. Leave the dough to rise for roughly 1 hour, until it has doubled in size. I find taking a snapshot with my camera phone to help as a sanity check as to whether the dough has risen enough or not.
When the dough has risen, dump it out again onto a flat, floured surface. Press it down firmly (no need to punch) with the flat of your hands to degas it. At this point, you can divide the dough for 2 9″ pans, or keep it whole for a 13″ pan.
Make sure the pan you choose to bake in is lightly greased and floured (I use Pam for Baking). Place the dough in the Pullman baking pan of your choice, folding and pressing it flat and into the corners of the pan. Put the lid of the Pullman pan on, leaving the lid slid open a tiny amount, about an inch.
Allow to rise again until it reaches the top of the pan, about 30 minutes.
Close the pan completely, and preheat the oven to 375F. Bake for 25 to 40 minutes, until crust is golden brown and the loaf sounds hollow when tapped. My loaf usually takes exactly 35 minutes, but your mileage may vary.
Allow to cool completely before slicing, as cool bread slices more evenly and without many crumbles.
[wpurp-searchable-recipe]Nuts & Bolts: Bread Baking Essentials – – – [/wpurp-searchable-recipe]

How do I sell online
Monday 12th of December 2011
Those breads looks delicious. It's been a while since I've baked bread but will definitely go straight to my kitchen tonight.
Jamie | My Baking Addiction
Thursday 8th of December 2011
Love this post, Amber! Oh, and I'm totally buying that square pan - perfect for the OCD in me!
Rachel @ Not Rachael Ray
Thursday 8th of December 2011
Helpful post! I love that square loaf of bread...might be adding that to my Christmas list!
JennyMooMeow
Wednesday 7th of December 2011
I think the bread pan and dough whisk will soon come to my house. Thanks for the tips!
Jenny G
Tuesday 6th of December 2011
I''ve always wanted to make bread and now I think I can.
Amber
Tuesday 6th of December 2011
Jenny, I KNOW you can do it! Feel free to email me if you need help along the way. Amber at bluebonnets and brownies dot com.